
Plot a Course
Solution
by Jacqui Fashimpaur, Justin Yokota, Lumia Neyo, and Olga Vinogradova
This is the meta for the Navigation round, where all of the puzzles’ “answers” are solutions in a 2D grid. As the flavor text suggests, these solutions will be interpreted as maps of what cells are safe and unsafe to travel through in their respective planes. The puzzle tells us directly how to interpret the solutions to Nonograms and Minesweeper puzzles: all placed items (lights, blocks, mines, and Minecraft items) make the cells they occupy unsafe. This gives us the following maps (where filled cells are unsafe).
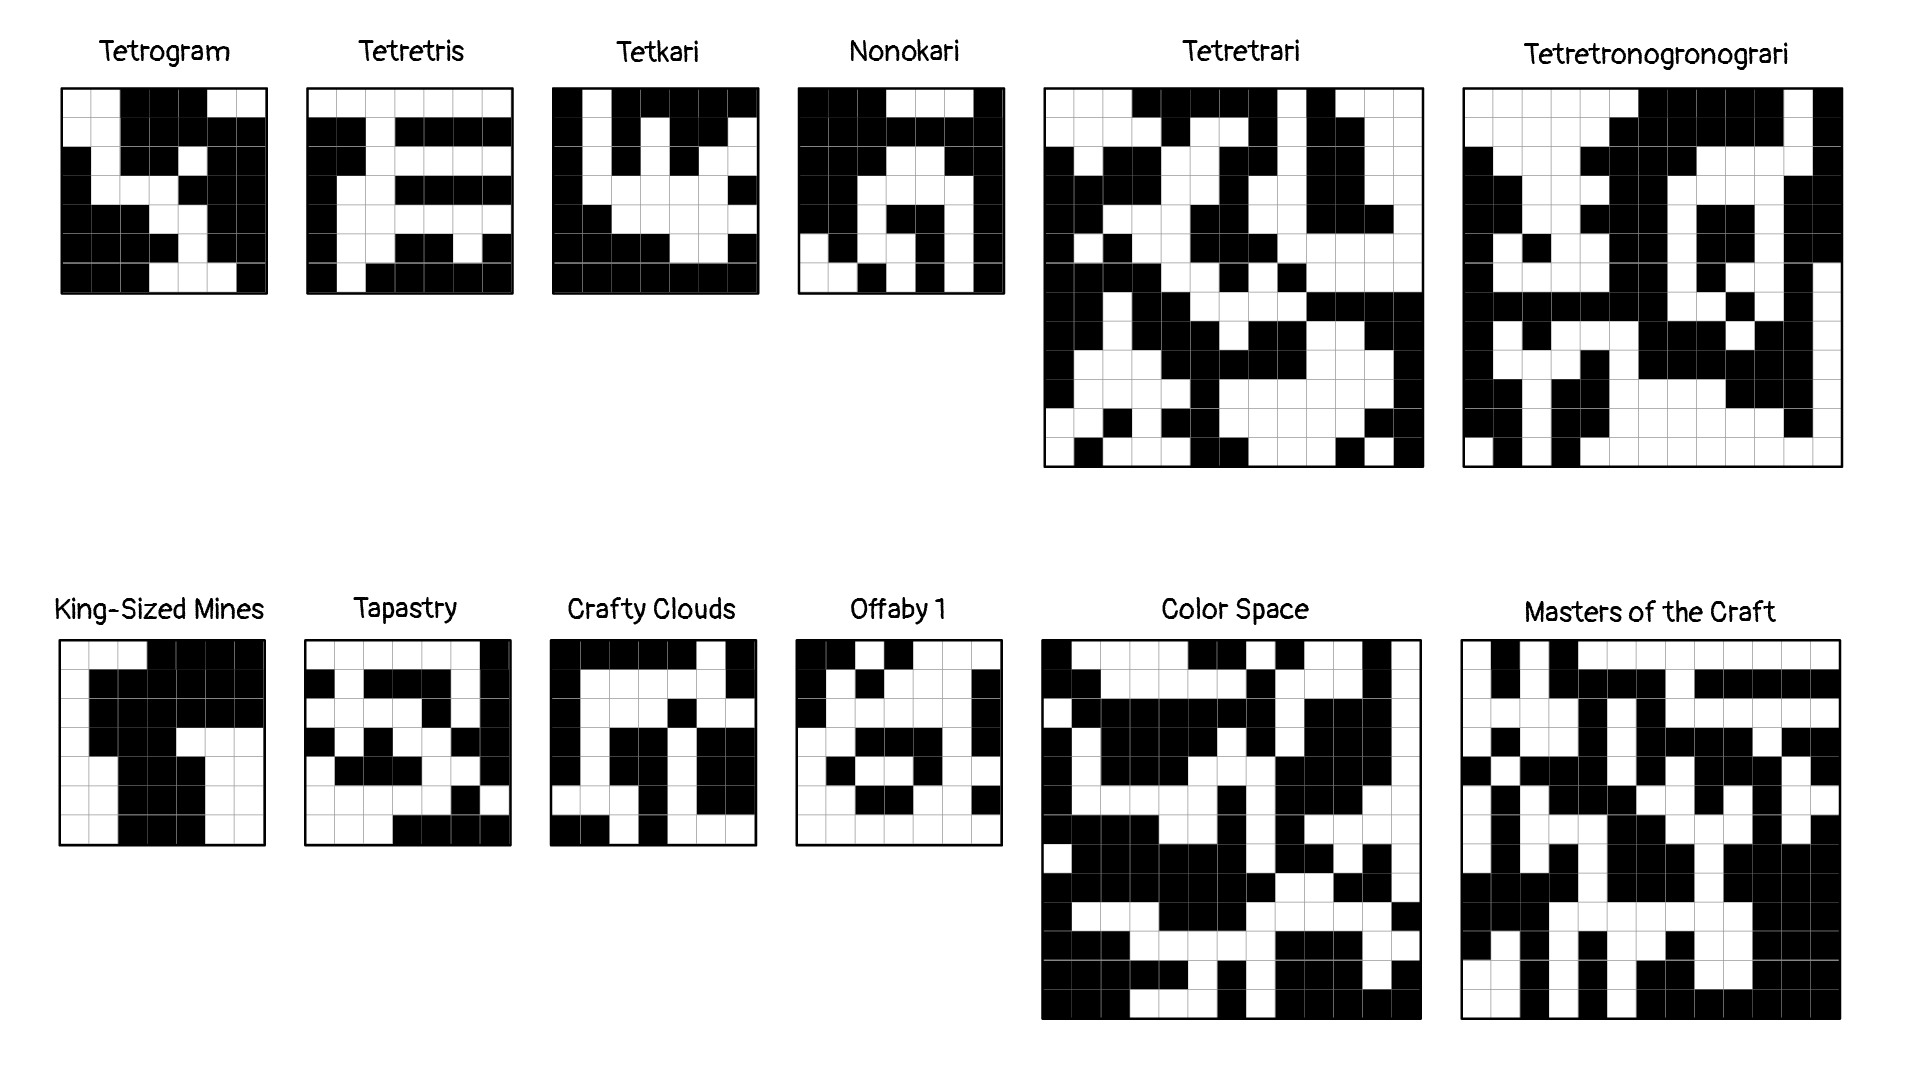
The Strands puzzles are a little trickier to interpret. The “Math” Spangram tells us that the part of each strand BEFORE THE = IS SAFE. The Checkmate Spangram tells us to AVOID ROOKS AND ROYALS (i.e. the rook, king, and queen words in the grid). The mini Spangrams aren’t so explicit, but if we look at the individual grids we can see that they always involve two different categories of strands, which can semantically associate with safety and danger. In “Hugs and Kisses” the strands are either associated with the letter X (dangerous) or O (safe). In “Stab Stab Stab Stab” the strands are either associated with Caesar (safe) or knives (dangerous). In “Only Connect: Red and Green Phrases” the strands are either associated with red (dangerous) or green (safe), and “All Around the Globe” uses the same red and green rule, this time depending on which color is present in the associated country’s flag. This leaves us with the following maps for the Strands sub-round.

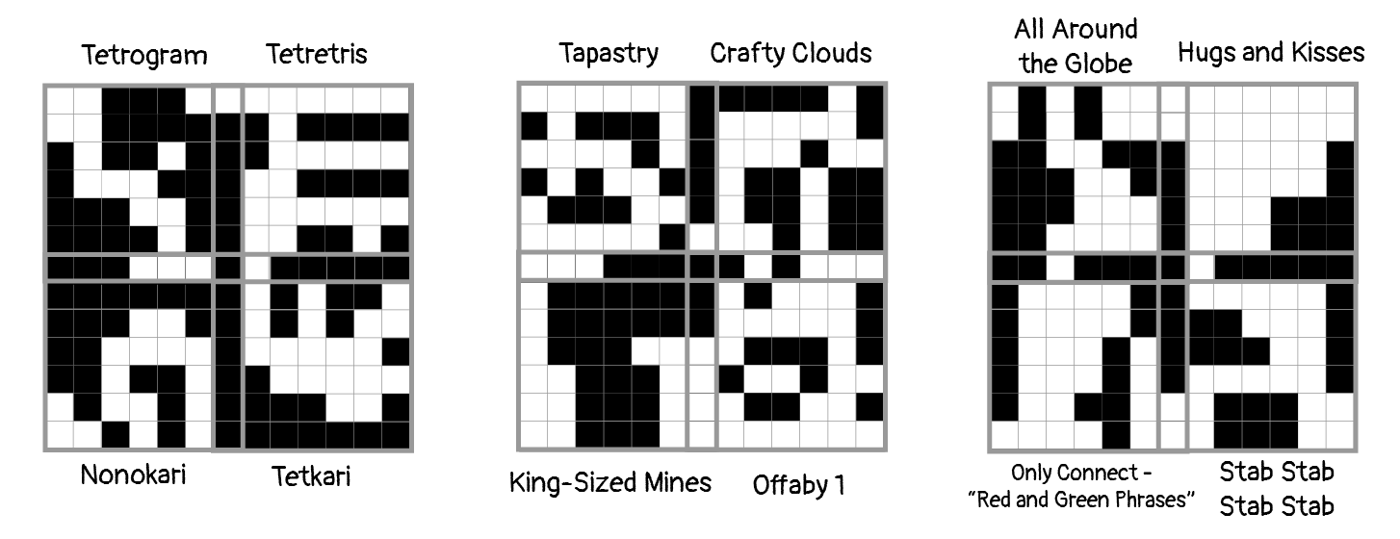
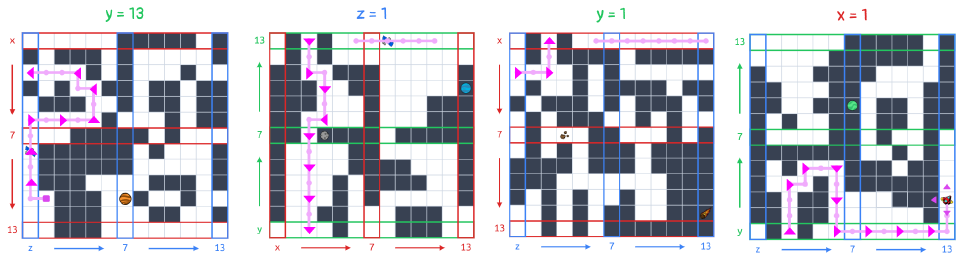
The puzzle’s interface suggests that we should have three 13 by 13 maps for each axis/puzzle type, but instead we have two 13 by 13 grids and four 7 by 7 grids. Considering how we could turn our mini-maps into a 13 by 13 map, we may notice that some of their edges have exactly matching safe/unsafe assignments. By overlapping the mini feeders where their edges match, we can make the following larger maps, rounding out our set of nine equally sized planes.
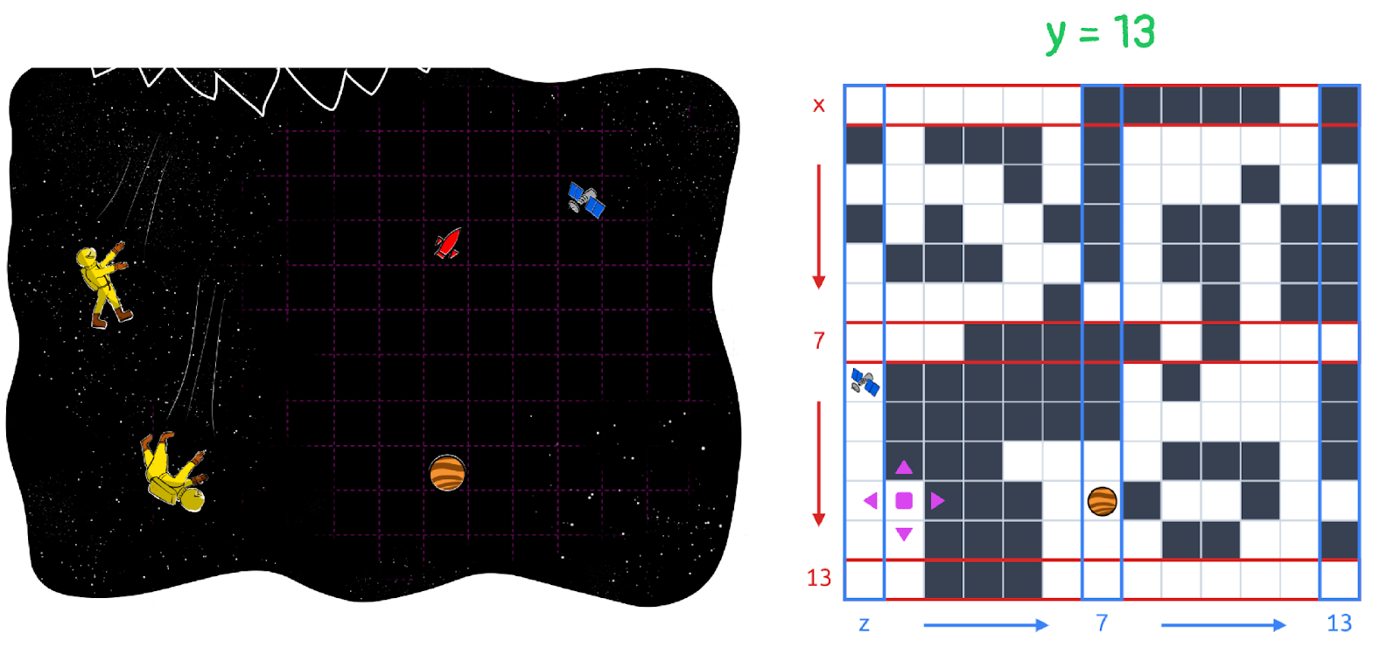
To arrange these planes within the cube, we must do a similar process: look for where a row or column in one grid exactly matches that of another. Our search space is constrained by the information the puzzle provides about which feeder type is associated with which axis, and what positions will have maps associated with them. Even without having every feeder solved, we can place the maps we have in the following way.
Now that we have our map, we have to find a route from the Arkose’s starting position to Marsh Haven. For this we’ll need our starting coordinates, which we can derive from the long-distance view Matt and Emma get at the end of the Spacewalk round, combined with the landmarks in this puzzle: the Arkose begins at (11, 13, 2).
From here we can solve the puzzle like a normal maze. It’s relatively small in terms of how much it branches, so a manual depth-first-search should work. There are several different paths from (11, 13, 2) to (1, 3, 13), and a few are below.


Here is the shortest possible path:
Once we’ve entered and submitted any of these, we’re done. Off to Marsh Haven!
Authors' Notes
It was a fun challenge to design a meta for this unconventional round. For flavor reasons, we knew we wanted to make solvers navigate 3D space, but we initially struggled to find a mechanic that would use feeder solutions in the way we wanted. Like a typical meta, no feeder should be useless but also no feeder should be absolutely required. We’re happy with the balance we reached with this sparsely-filled cube design.
While designing the maze of the meta itself, we made sure that it had the following properties:
- Every correct path involves at least a little of each feeder puzzle type.
- Every feeder plane (not every mini-puzzle) is a necessary part of at least one correct path.
- Every feeder is excluded from at least two correct paths.
We wrote the Navigation sub-rounds sequentially. First the Strands team claimed the z-axis and wrote their puzzles mostly unconstrained. Then the Minesweeper team claimed the y-axis and wrote their puzzles with some rows’ cells determined by the Strands grids. Next, we wrote this meta, looking for what connections between the other planes we should and shouldn't make to achieve our aforementioned goals. Finally, and heavily constrained, the Nonogram team wrote the last sub-round for the x-axis.