
Built to Spec
Solution
by Catherine Wu, Christopher Reyes, Connor Tilley, Jacqui Fashimpaur, and Liam Thomas
Answers: JERRY-RIGGED SAWLADDERS IN CHUTE
Starting the Puzzle - How do we use feeder answers?
This is a metapuzzle for the round of puzzles at the ship’s toolbench. On any given loop through the hunt, the Toolbench round will have 6 feeder answers, which appear as “components” on this meta’s page. The flavortext tells us we need to put these components together using the spare parts.
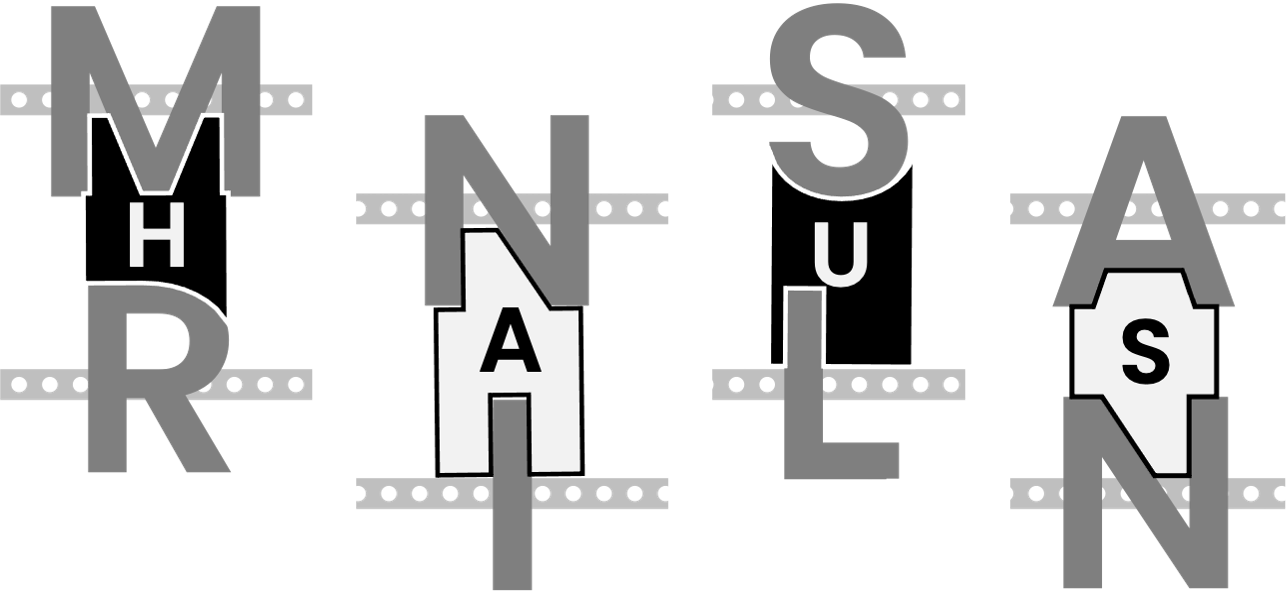
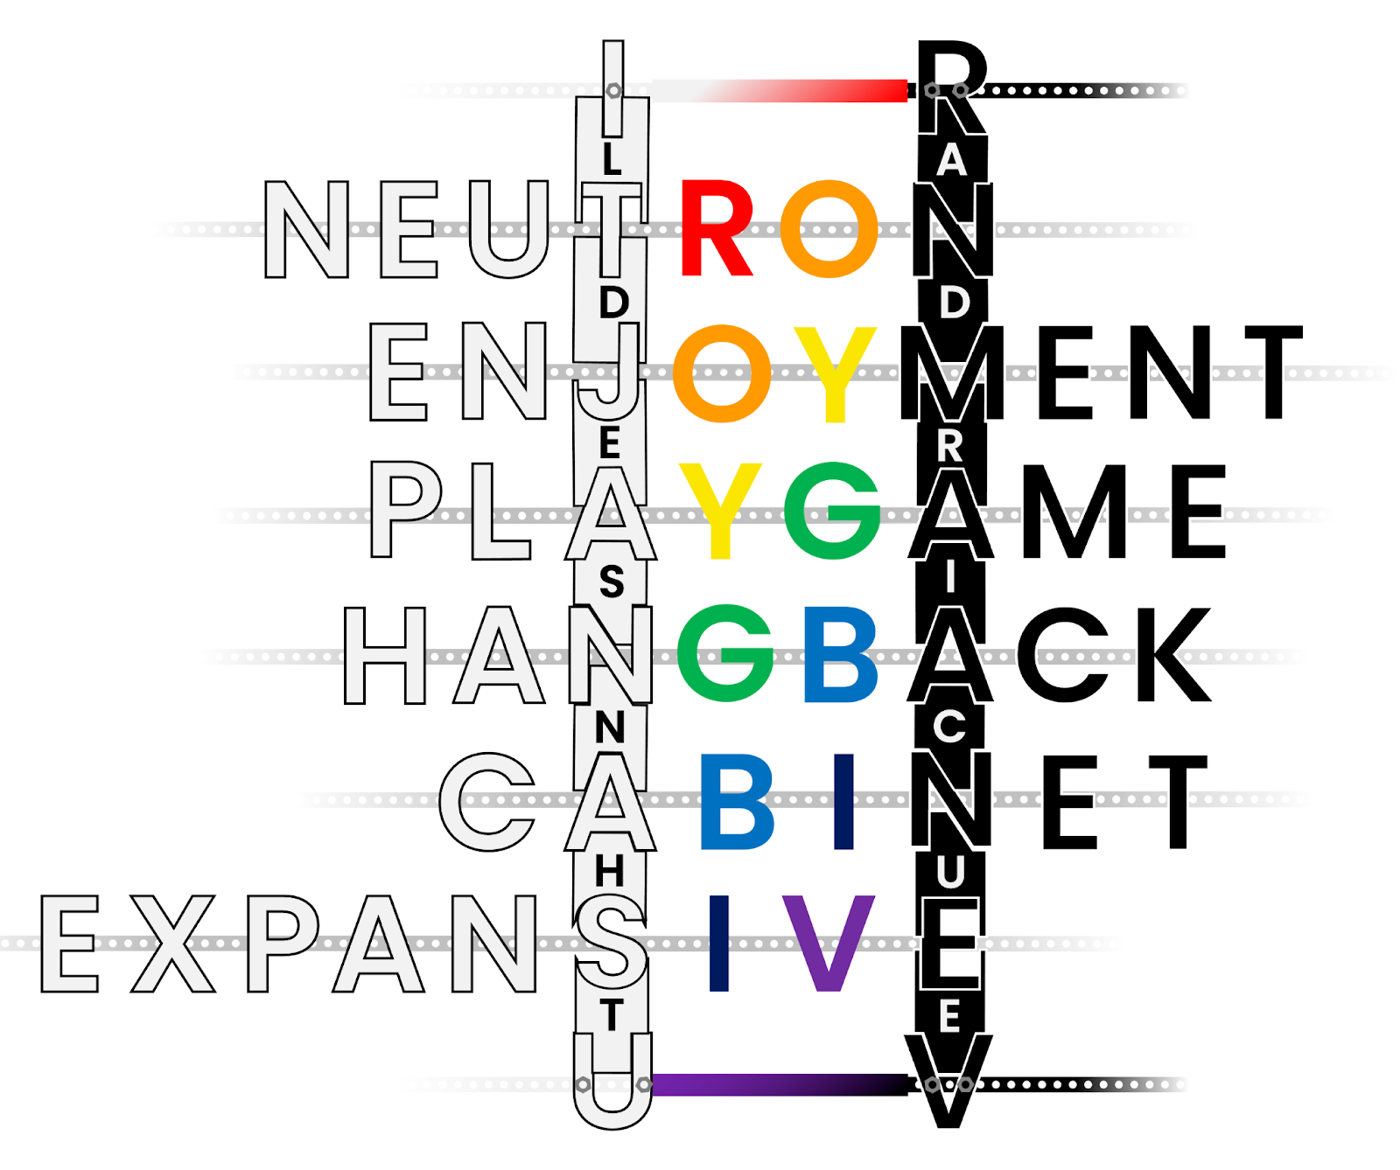
Looking at the artwork in the puzzle shell, there are 6 empty bars: one for each feeder answer. We could try centering them vertically on the bars like the given letters. But what about the spare parts? We might notice that the longest ones are just the right height to fit between two bars, or that their shapes resemble the negative space around the tops and bottoms of capital letters. Indeed, we will be using these parts as connectors between the letters of our feeder answers once they are “mounted” on the bars.
Now we need to figure out how to arrange our answers. We might notice that the bars at the top and bottom of the puzzle shell have some red and violet on them, with the letter pairs IR and UV. These are abbreviations for “infrared” and “ultraviolet”, which could hint that the visible light spectrum goes between them (“Built to Spec”, get it?). Looking at our answers, we can see that they each contain a bigram substring of ROYGBIV, and no other letters from that set. For example, AMYGDALA has YG and HANGBACK has GB.
From here we would want to arrange our answers to have the bigrams RO - OY - YG - GB - BI - IV in that order, but that may not be possible from our current answer set.
Toolbench Round Structure - Determining the correct set of answers
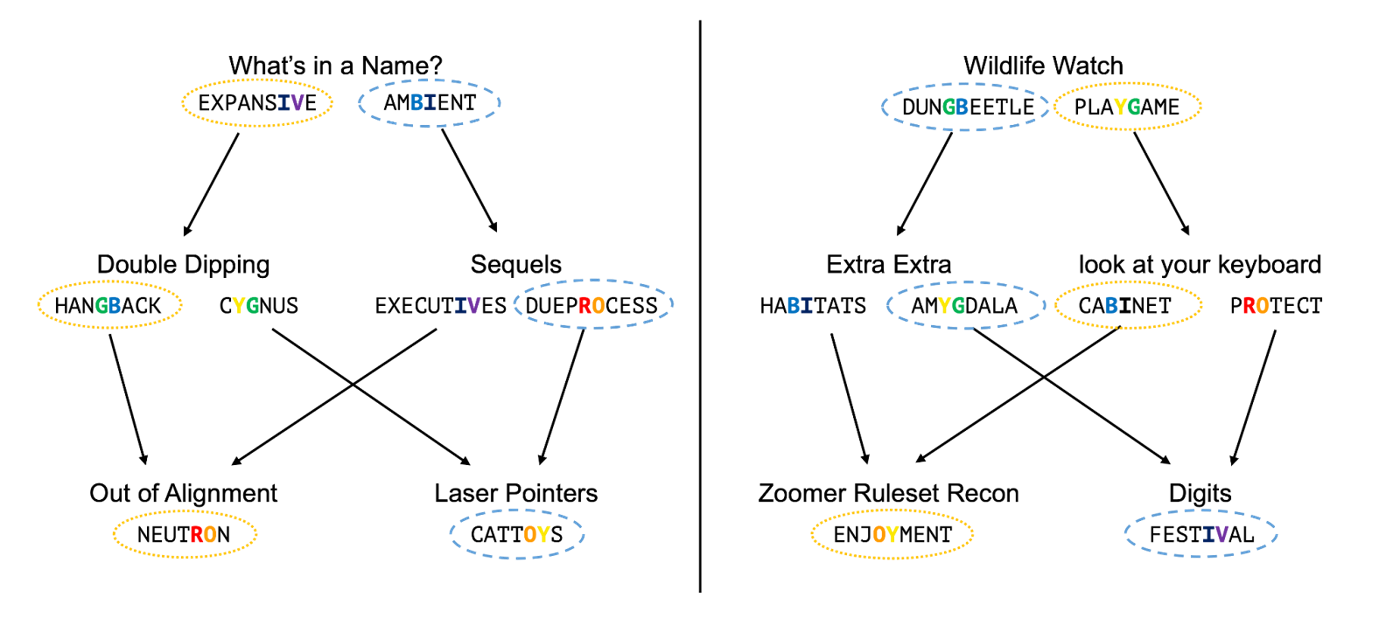
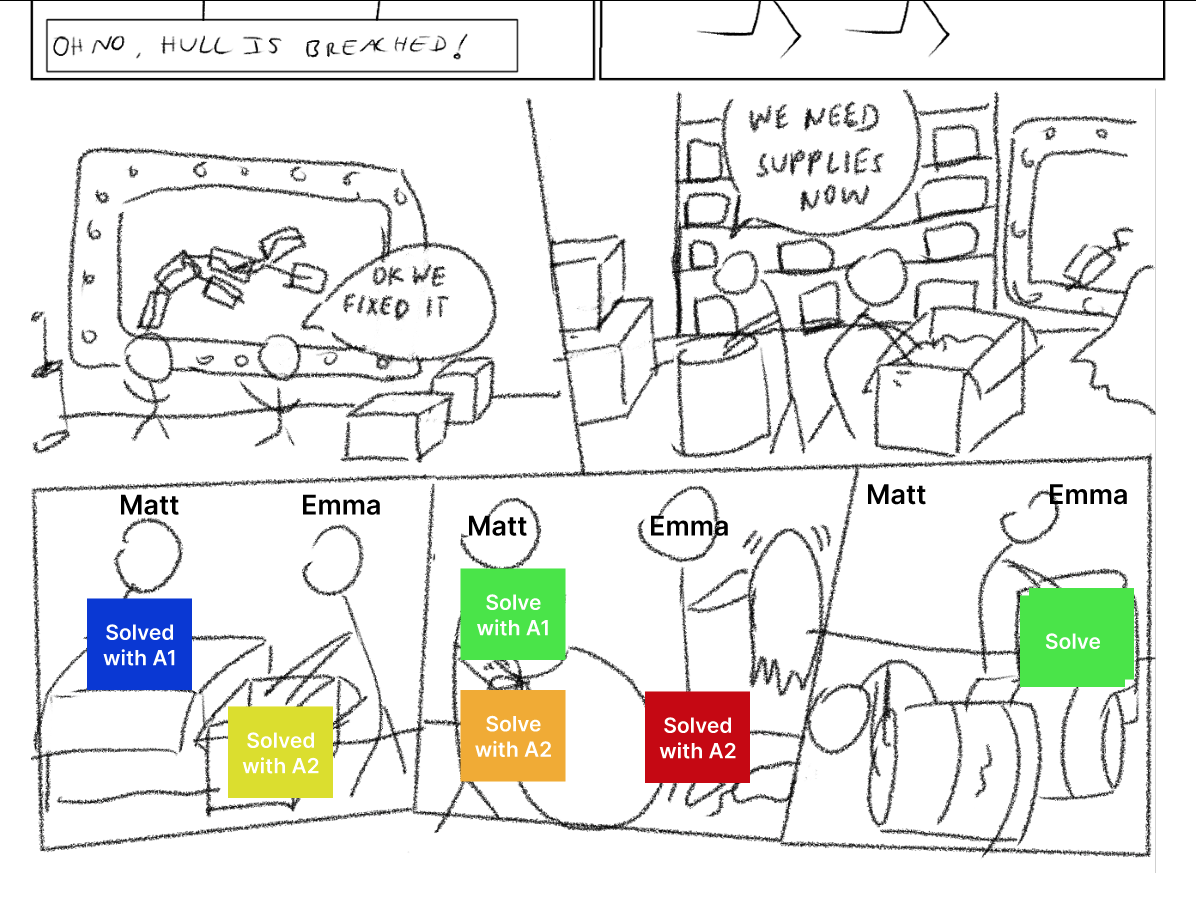
The note about Matt and Emma potentially not having the right set of components confirms that we might get different “components” (feeder answers) depending on how we solve the round. At this point we realize, if we haven’t already, that many puzzles in this round have multiple answers. A reset or two reveals that the set of puzzles in the round is not fixed, and that the answer chosen for each puzzle determines the next puzzle that is unlocked.
We will need to explore the entire round (or most of it) in order to find a path that results in a set of 6 feeder answers with the correct bigrams. The complete unlock structure for the round is below. There are two routes through it that result in a valid set of answers; these sets are circled in blue dashes and orange dots respectively.
Final Assembly
With one of these sets of answers, we can now return to assembling everything in this meta. We place the answers on the gray bars, aligning the ROYGBIV bigrams in the center between the red and purple stripes. Starting with the given I and R, we use some of the “spare parts” to connect letters in a column to the left (white pieces) and right (black pieces) of those color bigrams. There should only ever be one possible piece of the appropriate color that fits with both neighboring letters. The final construction possibilities are below.
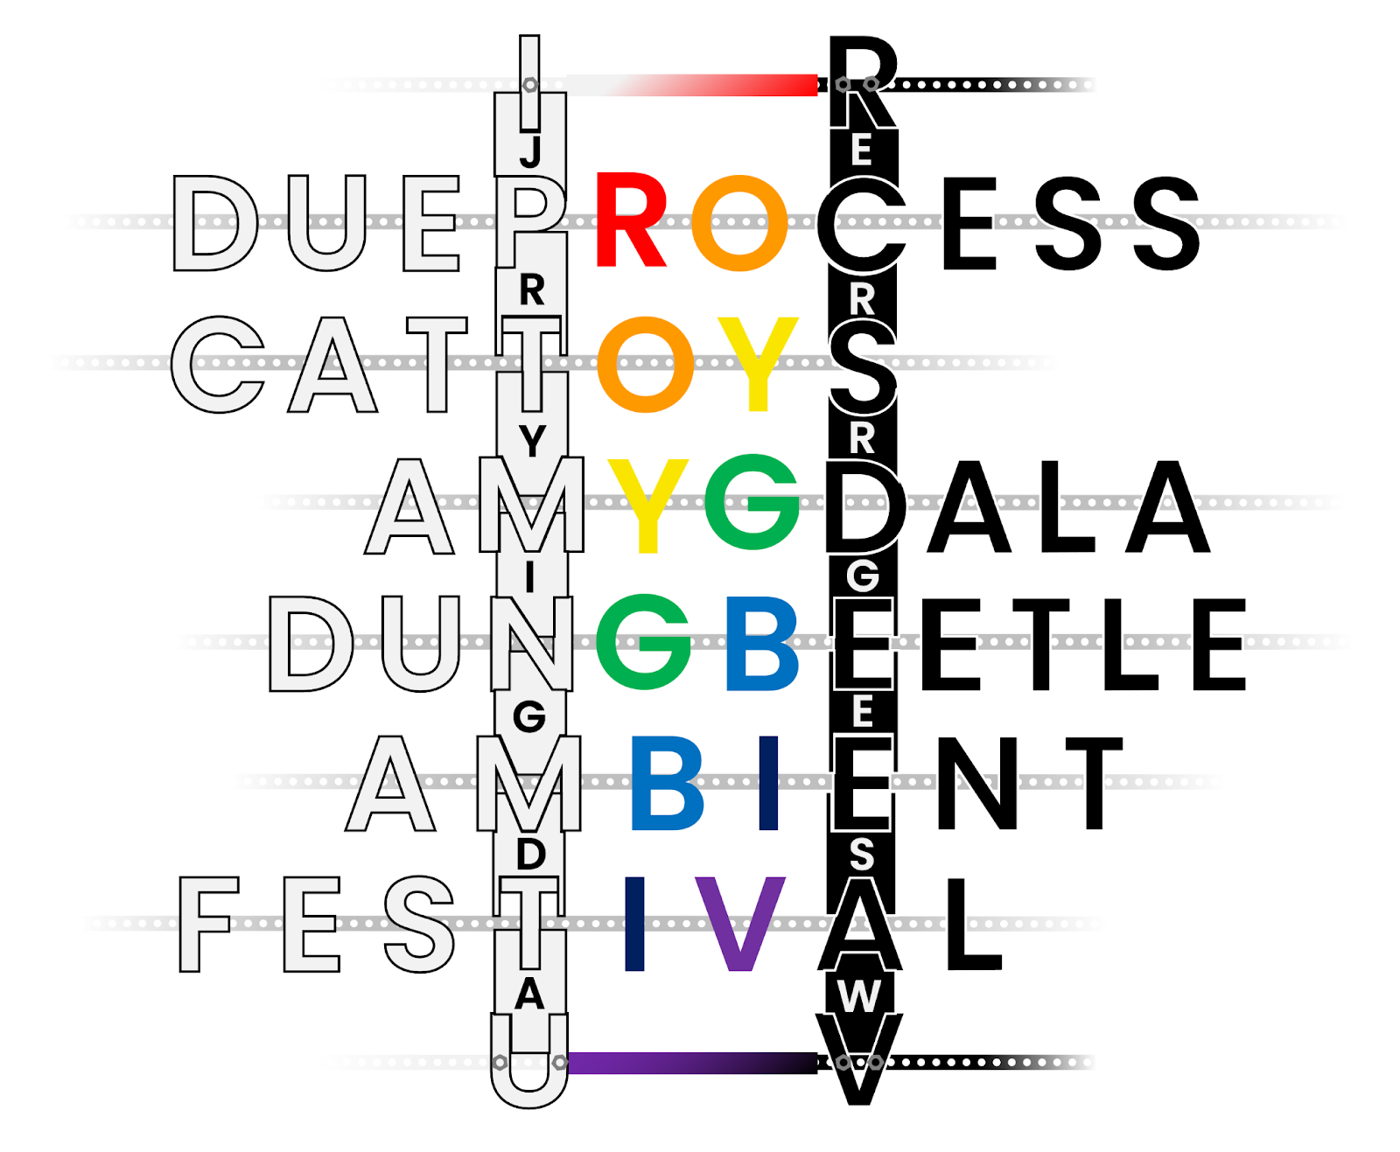
Taking the letters from these spare parts in reading order, we get the two potential answers to this puzzle: Matt and Emma could build a JERRY-RIGGED SAW or LADDERS IN CHUTE, depending on how they solved the round.
Authors’ Notes
We came up with the “many branching paths” unlock structure for this round before we wrote this meta. In a very early test of the hunt’s overall structure, we used colors as a placeholder for the answer properties that solvers needed to make a complete set of. When we came back to brainstorming this meta, we couldn’t beat the “make a complete rainbow” idea.
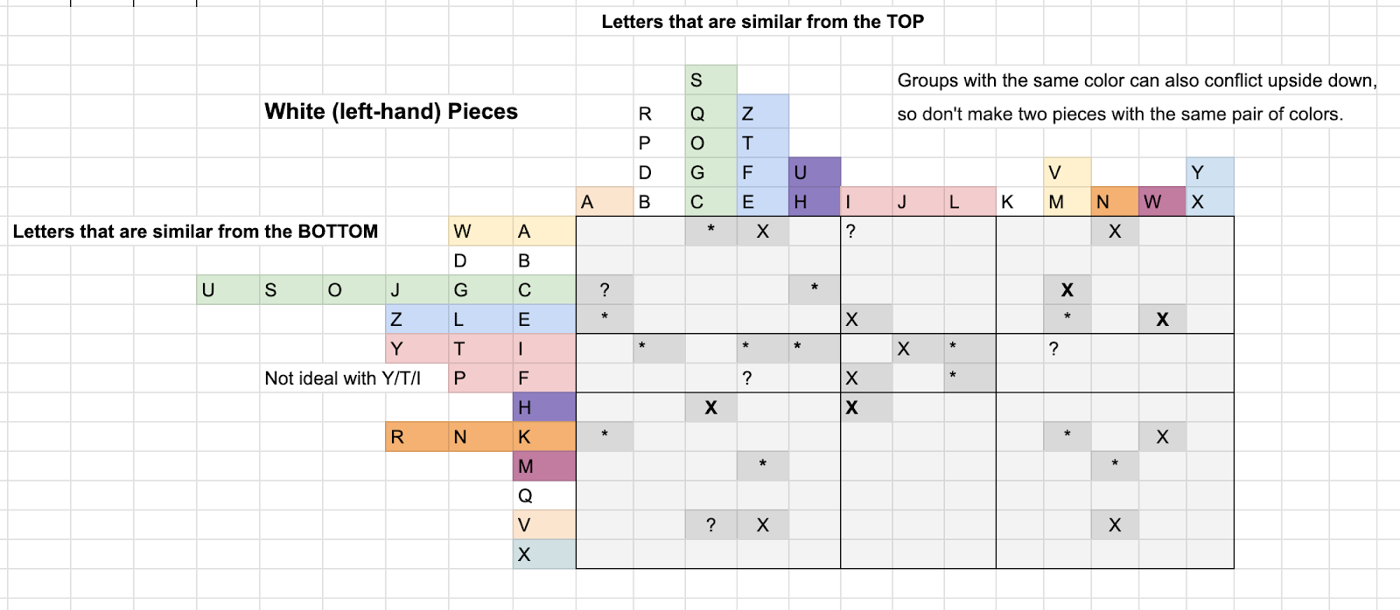
We chose a font (Poppins) that had as much shape similarity as possible between letters, so the same “spare parts” could believably be used for e.g. the bottoms of O, C, or G. Many fonts intentionally use slightly different curves in every place, which improves readability and is usually good, but could have turned this into a puzzle about examining the minutiae of a font, which was not our goal. All this shape similarity hopefully simplified the solving process, but it made construction more difficult in that we needed to find two sets of answers where no two pairs of adjacent letters shared a similar “spare part.” This proved to be impossible before the white/black split, and still required careful planning afterwards.